
Learn how to schedule assessments in Knowella to ensure timely assignment, completion, and tracking.
Creating an assessment schedule helps ensure that assessments are assigned, completed, and tracked on time. In Knowella, scheduling an assessment is a simple and guided process that allows you to plan assessments for individuals or teams with ease.
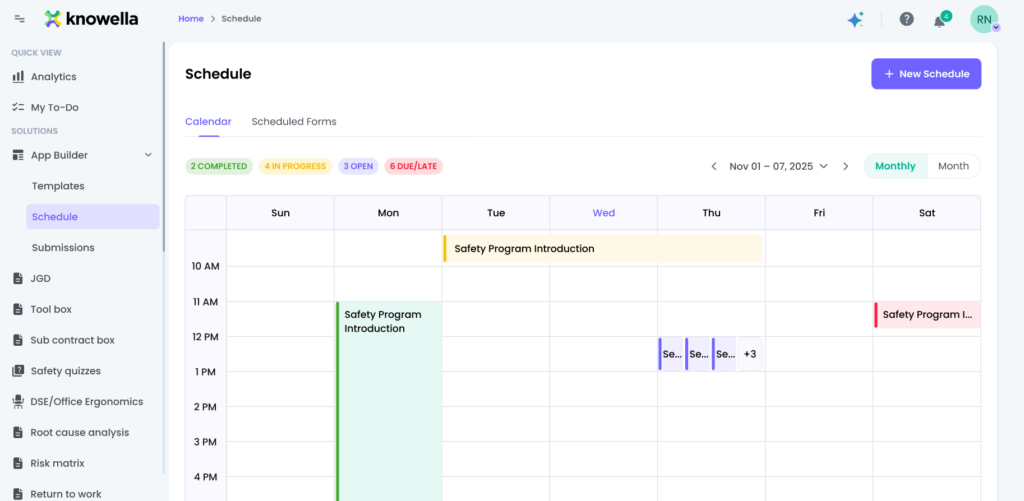
Step 1: Navigate to Schedule
Start by navigating to the App Builder section from the left-side menu. Under App Builder, click on Schedule. This will open the Schedule page, where you can view existing scheduled assessments in a calendar format.
Step 2: Create a New Schedule
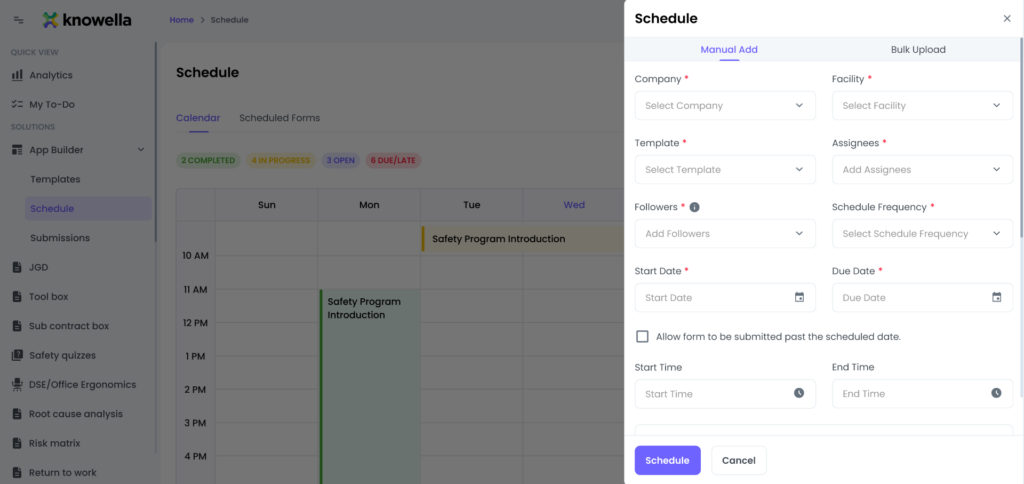
On the top-right corner of the Schedule page, click on the New Schedule button. This opens the scheduling panel, where you can add a new assessment schedule either manually or through bulk upload.
Step 3: Fill in Schedule Details
In the Manual Add section, provide the required details such as:
- Company
- Facility
- Template
Next, select:
- Assignees who will complete the assessment
- Followers who need visibility into the assessment
Choose the Schedule Frequency based on your requirement:
- Non-Recurring for one-time assessments
- Every Day
- Every Week
- Custom schedules
Step 4: Set Dates and Time
Select the Start Date and Due Date for the assessment. You can also define:
- Start Time
- End Time
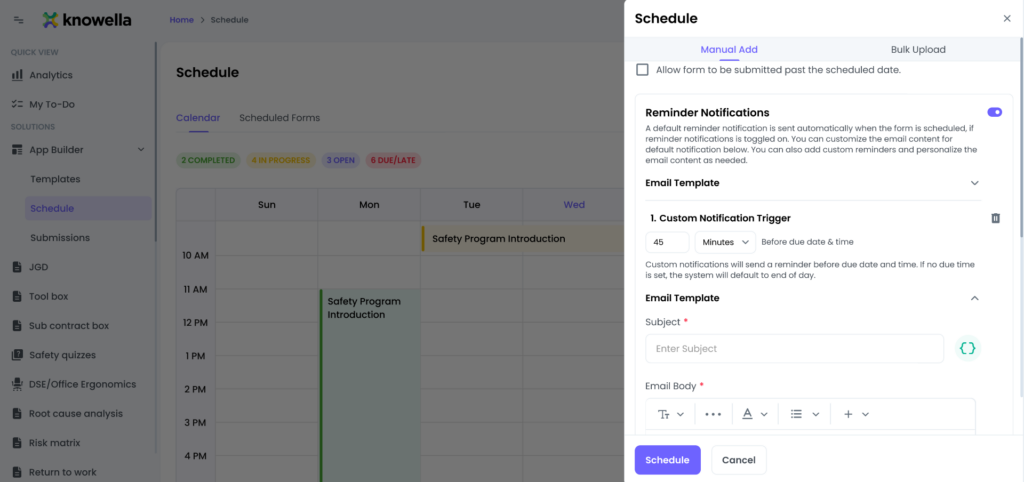
If needed, enable the option to allow the form to be submitted past the scheduled date.
Step 5: Configure Notifications
Enable reminder notifications to ensure assignees are notified about upcoming or overdue assessments. You can:
- Customize the email subject
- Edit the email body
- Use dynamic variables to include assessment details
Step 6: Save the Schedule
Once all details are reviewed, click on the Schedule button. The assessment will now appear on the calendar and will be automatically assigned based on the schedule you created.
Conclusion
Creating an assessment schedule in Knowella ensures timely distribution and completion of assessments. With flexible scheduling options, automated reminders, and clear visibility, managing assessments becomes efficient and hassle-free.
Need more help?
If you need assistance with template design or advanced features, contact: support@knowella.com
